

Developing IoT applications or devices involves designing, programming, and optimizing many devices, which is time-consuming and hardware-intensive. Therefore, IoT simulator tools help us simulate IoT projects using different microcontrollers for fast prototyping and debugging.
In this blog, we will learn how to simulate IoT projects by using an IoT simulator Wokwi to simulate an example IoT project - Temperature Monitoring with ESP32.
In this article:
Part 1. Learn about the IoT Simulator Wokwi Part 2. IoT Simulation Example Project: Temperature Monitoring with ESP32 Part 3: One-Stop IoT PCBA Manufacturer PCBONLINE from R&D to Box BuildsLearn about the IoT Simulator Wokwi
Wokwi is a web-based IoT simulator that you can use to simulate microcontroller-based projects such as Arduino, ESP32, STM32, or Pi-Pico. It contains a large number of sensors, displays, inputs, and outputs that are required to build an IoT device.
Features of Wokwi:
- Supports mainstream microcontrollers for IoT PCB prototyping, such as Arduino, ESP32, STM32, Raspberry Pi pico, etc.
- Wokwi has a large number of popular sensors and displays. Sensors include ultrasonic, temperature and humidity, motion, and accelerometers. Displays include Loadcell, etcOLED, TFT, e-paper, TV, analog, LCD, etc.
- You can write the codes in different programming languages, such as Arduino, Micropython, Circuitpython, Rust, etc.
- It supports real-time debugging and allows team collaboration.
- If your desired component is not in the list of available components, you can create your components.
- Wokwi can also be used in VS-Code, using the command line, which can help you automate the simulation scenarios, and in GitHub CI/CD.
IoT Simulation Example Project: Temperature Monitoring with ESP32
In this project, we will use ESP32 and a temperature sensor DHT22 to simulate temperature and humidity values and publish the values to the MQTT broker.
We will follow the following steps.
Step 1. Creating a new project
You will need to log in or register a Wokwi account first.
Once signed in, click on your profile picture on the top right of the webpage, as shown in the following figure, and click "My Projects".
A project page will open, which will show the projects that you have already created. You can click "New Project", as shown in the following figure.

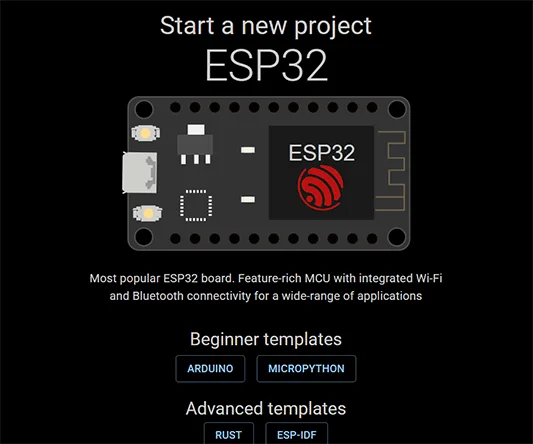
Then, it will show you a list of microcontrollers. For this project, we will choose ESP32.
A new page will open, and it will ask you for a beginner template. For this project, we will choose ARDUINO, as shown in the following figure.
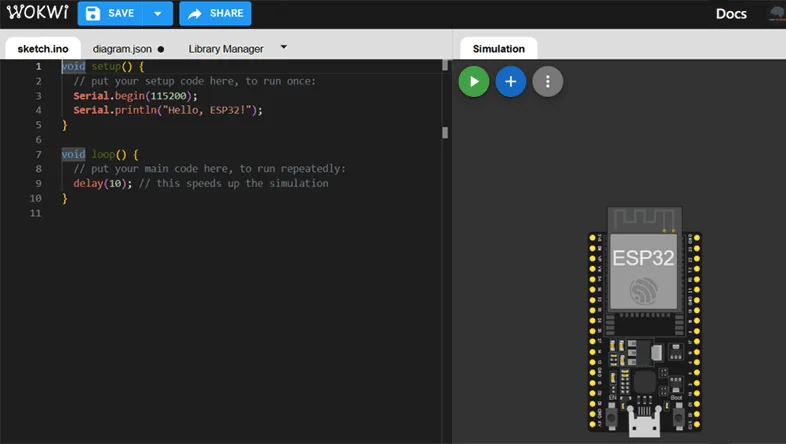
The Wokwi simulation page shown as follows will open. Now, we will create a circuit.
Step 2. Circuit design
To create a circuit, we will first get the DHT sensor by clicking the "+" sign in the simulation tab, as shown in the figure.
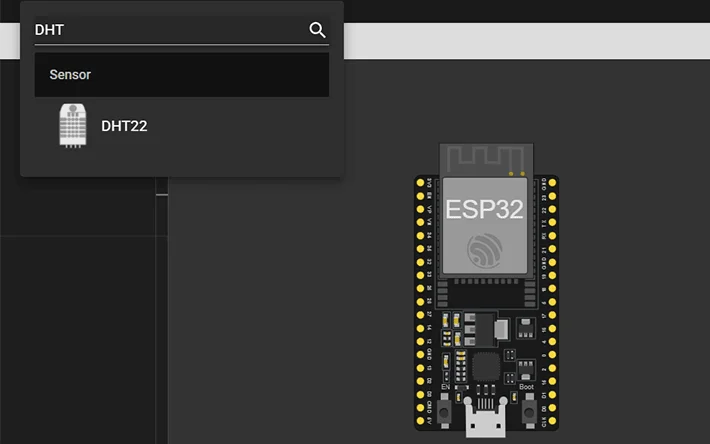
We will select DHT22, and it will appear with ESP32, as shown in the figure.
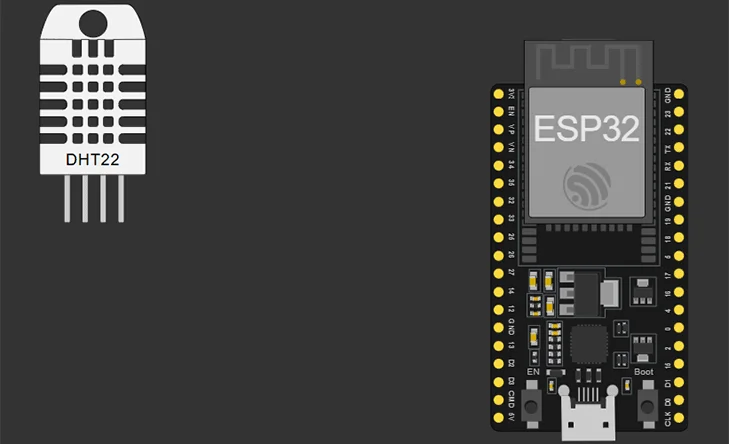
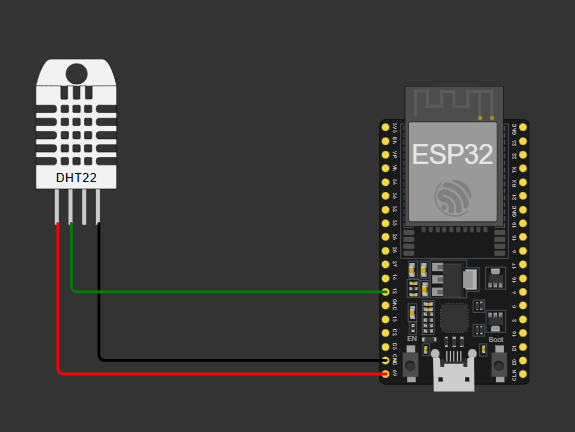
If you hover over the DHT or ESP32 pins, the pin names will appear. As shown in the table and figure, we will make the circuit by making the following connections.
|
DHT22
|
ESP32
|
|
VCC
|
5V
|
|
SDA
|
12
|
|
NC
|
Not connected
|
|
GND
|
GND
|
Step 3. Coding
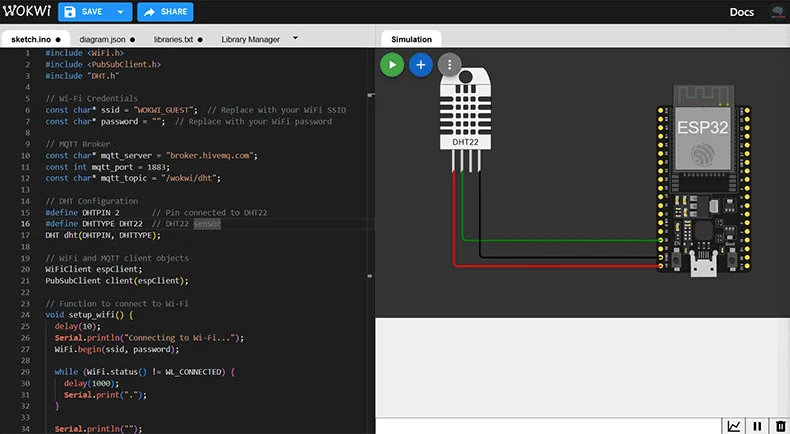
On the right side of the webpage, in the sketch.no, we will paste the following code.
#include
#include
#include "DHT.h"
// Wi-Fi Credentials
const char* ssid = "Wokwi-GUEST";
const char* password = "";
// MQTT Broker
const char* mqtt_server = "broker.hivemq.com";
const int mqtt_port = 1883;
const char* mqtt_topic = "/wokwi/dht";
// DHT Configuration
#define DHTPIN 12 // Pin connected to DHT22
#define DHTTYPE DHT22 // DHT22 sensor
DHT dht(DHTPIN, DHTTYPE);
// WiFi and MQTT client objects
WiFiClient espClient;
PubSubClient client(espClient);
// Function to connect to Wi-Fi
void setup_wifi() {
delay(10);
Serial.println("Connecting to Wi-Fi...");
WiFi.begin(ssid, password);
while (WiFi.status() != WL_CONNECTED) {
delay(1000);
Serial.print(".");
}
Serial.println("");
Serial.println("Wi-Fi connected!");
Serial.println("IP address: ");
Serial.println(WiFi.localIP());
}
// Function to connect to the MQTT broker
void reconnect() {
while (!client.connected()) {
Serial.println("Attempting MQTT connection...");
if (client.connect("ESP32Client")) { // Connect with a client ID
Serial.println("Connected to MQTT broker");
} else {
Serial.print("Failed, rc=");
Serial.print(client.state());
Serial.println(" Retrying in 5 seconds...");
delay(5000);
}
}
}
void setup() {
Serial.begin(115200);
setup_wifi();
client.setServer(mqtt_server, mqtt_port);
dht.begin();
}
void loop() {
if (!client.connected()) {
reconnect();
}
client.loop();
// Read DHT22 values
float temperature = dht.readTemperature();
float humidity = dht.readHumidity();
// Check if reading is valid
if (isnan(temperature) || isnan(humidity)) {
Serial.println("Failed to read from DHT sensor!");
return;
}
// Create JSON payload
String payload = "{\"temperature\": ";
payload += temperature;
payload += ", \"humidity\": ";
payload += humidity;
payload += "}";
// Publish to MQTT topic
Serial.print("Publishing message: ");
Serial.println(payload);
client.publish(mqtt_topic, payload.c_str());
delay(2000); // Wait for 2 seconds
}
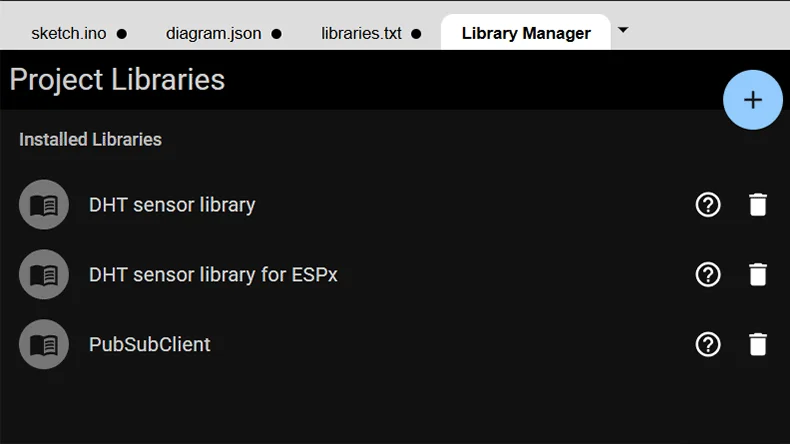
Then, in the Library Manager, we will add the following libraries, as shown in Figure. You can add librarians by clicking the "+" sign.
Step 4. Simulation
Finally, we can start the IoT simulation by clicking the play button in the simulation, as shown in the following figure.
You can click on DHT22 to change the temperature and humidity values. The changes will also be shown in the serial monitor, as shown in the following figure.
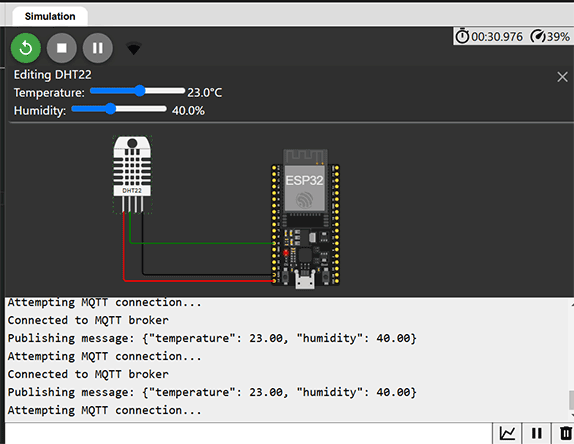
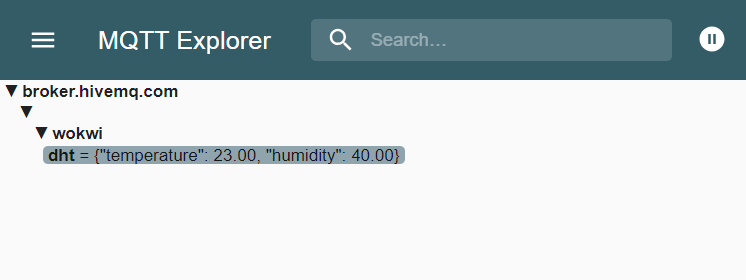
You can look at the published value using any MQTT client. For example, I subscribed to /wokwi/dht topic using MQTT explorer and got the following messages.
One-Stop IoT PCBA Manufacturer PCBONLINE from R&D to Box Builds
With an IoT simulator, you can prototype, debug, and optimize IoT-based or microcontroller projects. When you need your IoT project developed and manufactured at one stop, you can work with the turnkey PCBA manufacturer PCBONLINE, which offers R&D and all-around electronics manufacturing capabilities, from PCB prototyping to box-build assembly.

Founded in 1999, PCBONLINE has two large advanced PCB manufacturing bases, one PCB assembly factory, stable supply chains, and an R&D team.
PCBONLINE is a source factory IoT PCBA manufacturer and provides hardware and software R&D, prototyping/sampling, PCB fabrication, component sourcing, PCB assembly, PCBA value-added, and box-build assembly.
PCBONLINE offers one-on-one engineering support and free design for manufacturing (DFM) to ensure smooth manufacturing and successful results for your IoT PCBA project.
PCBONLINE has long-term cooperation with mainstream MCU companies such as Espressif and the supply of MCUs and components for IoT PCBA is fast and steady.
We manufacture High-quality IoT PCBAs certified with ISO 9001:2015, ISO 14001:2015, IATF 16949, RoHS, REACH, UL, and IPC-A-610 Class 2/3.
When your IoT PCBA project enters the bulky production stage, PCBONLINE refunds the fees of R&D, sampling, and PCBA functional testing.
No matter what quantity of IoT PCBA boards you want, or what protocols your project uses, you can enjoy free and considerate engineering support throughout your project. To get a quote for your IoT PCBA project, contact info@pcbonline.com.
Conclusion
By using a temperature monitoring example project, this blog shows how to simulate IoT projects step by step. Not only Wokwi but there are many other IoT simulators available for IoT simulation. They have similar functions and operations. To get PCBA and electronics manufacturing for your IoT project, contact the one-stop IoT PCBA manufacturer PCBONLINE for one-on-one R&D support.
PCB assembly at PCBONLINE.pdf


